Engine hatch cover replacement
| Date: Tuesday, May 1, 2018. 1118Z |
| Location: 53°9'46.5N, 9°4'20.8W — Aughinish, IE. |
| WX: Wind 192° at 12.5 knots. Cloudy. Cold. Waves 0.5m. |
So, yesterday I found a little bit of time to go and figure out what to do with the engine hatch cover. a BIT OF BACKGROUND Might be in order, however…
The Achilles 24 comes as standard with a long-shaft outboard engine and an engine mount in the sole of the cockpit. This presents itself as a hatch towards the stern, which when removed, allows you to mount the engine in the little compartment, and when lowered, the prop is approximately in the same position as an inboard. It’s a big improvement over the typical outboard bracket on the transom, as the prop is less likely to come out of the water in a big sea.
In the case of Into The Mystic however, this engine compartment has been sealed up. The original owner instead, cut a new hole in the cockpit sole, just behind the companionway. In this, he mounted a Yanmar 1GM10 inboard diesel engine. The engine sits above the bilge, as any inboard would. He also added a P-bracket, cutlass bearing, stern gland, and all of the other accoutrements of your typical inboard diesel. Overall, it’s a nice job.
However, I’ve been plagued with a leak for as long as I’ve had the boat. Here’s a little newsflash; all boats leak, to some extent. Particularly older ones, and Into The Mystic, being born in April of 1973, is no exception. It’s not really a problem as long as the leak is above the waterline. In my case, the leak is substantial enough that the bilge will fill with rainwater after only a week or two of a typical Irish summer.
Originally, when the engine sat in the engine bay over a winter, it corroded fairly badly and eventually seized up. I removed the engine, rebuilt it, and now it is in the garage on a pallet, warm and dry. The engine mounts are also corroded, and those little puppies ain’t cheap! I have new engine mounts, and the engine is ready to be re-installed, but I’ve been holding off until I could figure out the location of the leak.
As I’ve been working my way towards the stern, cleaning up the boat, I started to clean the engine bilge. As part of this work, I removed the wooden hatch cover over the engine bay. The cover itself is glass-covered ply and is fairly solid, even after 30 or 40 years. However, how it attaches to the cockpit sole isn’t particularly secure or waterproof. I decided to fabricate a new hatch cover out of glass fibre. So, step one was to make a mould based on the dimensions of the opening in the cockpit sole. I pulled out the old hatch cover, and began measuring. I discovered that the wood surround on the cockpit sole was spongy - not good! Unfortunately, the wood had been sealed in place using fibreglass tape and epoxy. But this had been glued over the gelcoat and hadn’t made a solid bond. Over the years, the water sluicing around the cockpit had crept in under the glass fibre tape, and rotted the wood. I started pulling out screws and ripping out rotten wood. It gets worse though, because the cockpit itself is a GRP/ply sandwich. This is common enough. Instead of laminating up a glass fibre deck/cockpit which was at least 5mm thick and probably needed to be 10mm thick in order to provide structural integrity to the deck, they lay up about 2 or 3mm of glass fibre, cover it with a layer of plywood, and then lay up another 2 or 3mm on top of that. It’s amazingly strong in the same way that an I-beam resists bending. In my case, however, it has turned to brown mush.
The first job will be to scrape out all of the rotten plywood between the layers of fibreglass, and then either re-fill it with ply or (more likely) just fill the whole thing with West epoxy and 406 filler. From there, I need to rebuild the housing around the opening. The idea, basically, is to prevent seawater (and indeed rainwater) from getting in through any gap in the hatch cover, by adding a lip around the opening, about 1cm high. The hatch cover will sit over this lip (and a rubber gasket) and that should prevent any water making its way into the cabin/engine bay. I’ll have to fashion a lip using either plywood or pine strips, seal it with epoxy, and then bed it into place using glass fibre tape or plain old chopped, strand mat. An important piece of this is making sure that the glass is properly bonded to the cockpit sole. I had hoped that all I needed to do was to fabricate a new hatch cover, but now it looks like I need to do a lot of remedial work as well.
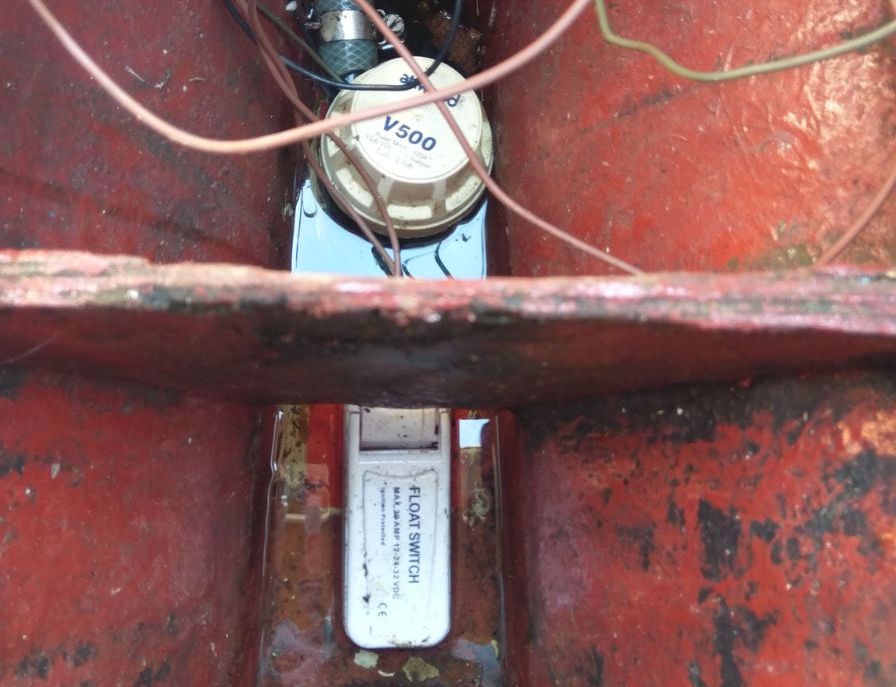
The good news is that I’m pretty sure this has been the cause of the most egregious leaks. Also, as you might notice from the picture above, the bilge pump is operating nicely. The float switch kicks in when there is about 75mm or so of water in the bilge. The pump drains this out via the non-return valve. There is a little bit of hysteresis in the switch, so it only switches off the pump when there is around an inch of water left in the bilge. Ideally it would completely drain the bilge, but that’s pretty hard. You need a sump so that the bilge water fills the sump and the pump then can drain the sump almost completely. Overall though, I’m happy that the bilge is now staying dry thanks to the pump and float switch, and that I’ve found the main cause of the leak. Once I replace the hatch seal up the cockpit sole properly, I’ll be ready to install the new engine mounts and ultimately lower in the rebuilt engine.
Mind you, I need to paint the engine first, and probably replace the stern gland. I also need to clean out the engine bilge and paint it. Overall though, I think there’s progress.